
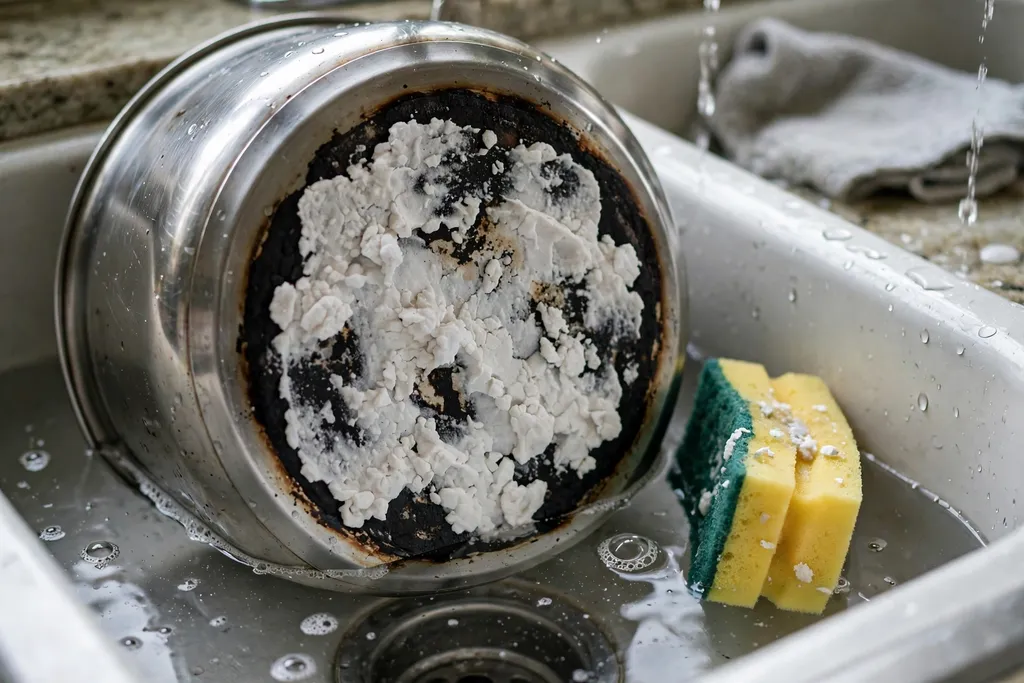
How to Clean a Burnt Pot Without Scrubbing for Hours
Every cook has done it: a phone call, a knock at the door, a moment of distraction, and dinner has welded itself to the bottom of a favourite pot. The blackened layer looks permanent, and the instinct is to attack it with everything in the cupboard. Resist that instinct. Learning how to clean a burnt pot is mostly about patience, not force. Burnt food is carbonized material bonded to metal or coating, and the reliable way to remove it is to soften that bond with water, heat, and a mild alkali, then lift it away gently. Scrubbing harder, sooner, usually just damages the pot while the burnt layer stays put.
The methods below are ordered from gentlest to strongest. Start at the top and work down only if the pot still needs it. Most everyday burns come clean with the first two methods. The stronger methods are for the truly stubborn cases: the pot that boiled dry, the sugar that turned to charcoal, the sauce that sat on high heat while nobody was watching. Timings here are guidance, not guarantees. How long a method takes depends on how badly the pot burned, how thick the layer is, and what the pot is made of, so treat every range as a starting point and repeat a step rather than escalating to something harsher.
Before You Start: Cool Down and Assess the Damage
First, let the pot cool. Never pour cold water into a screaming-hot pan: the sudden temperature change can warp metal, crack enamel, and send a burst of steam into your face. Wait until the pot is warm rather than hot, then scrape out any loose food with a wooden spoon or a silicone spatula. Do not use a metal utensil for this step, especially on coated surfaces. You are not trying to remove the burnt layer yet, just clearing the loose debris so the cleaning solution can reach the bonded layer underneath.
Next, identify what you are cleaning. Stainless steel is the most forgiving material and can handle all of the methods below. Non-stick coatings are the most delicate and should never meet steel wool, metal scourers, or harsh abrasives. Cast iron needs its seasoning protected, so long soaks are out. Enamelled cast iron and enamelled steel sit in the middle: tough, but vulnerable to chipping and to thermal shock. If you are unsure what a pot is made of, check the base or the maker's markings before you start, and default to the gentlest method. A pot saved slowly is better than a pot scratched permanently in five minutes.
Method 1: The Hot Water Soak
For light to moderate burning, a plain hot water soak is often enough, and it is the method least likely to cause any damage. Fill the pot with hot water, add a squirt of ordinary dish soap, and leave it to soak. For a light burn, 30 minutes to an hour may do it. For a heavier layer, leave it overnight. The water softens the burnt food, the soap helps lift grease, and time does the rest. When you come back, most of the residue should wipe away with a soft sponge or a non-scratch scrub pad.
This method works best when the burnt layer is food rather than pure carbon. A scorched sauce, a stuck risotto, or milk that caught on the bottom will usually yield to a good soak. A layer that has been heated until it is essentially charcoal will need more help, which is where the next methods come in. If the soak alone leaves a thin dark stain but no raised crust, that is progress, not failure. Staining and burnt-on food are different problems, and a stain that will not budge with soaking may respond to a baking soda paste rather than more soaking.
Method 2: Baking Soda Paste or Simmer
Baking soda is the workhorse of burnt-pot cleaning, and for good reason. It is mildly alkaline, which helps break down burnt, acidic food residues, and it is a very gentle abrasive, so it can lift residue without gouging most surfaces. There are two ways to use it, and both are effective.
For the paste version, sprinkle a generous layer of baking soda over the burnt area, add just enough water to make a thick paste, and spread it over the burn. Leave it for 30 minutes to a few hours, or overnight for a stubborn case, then scrub gently with a soft sponge or a nylon scrub pad and rinse. This version is ideal for stainless steel and enamel, and for the outside of pots where simmering is not practical.
For the simmer version, cover the burnt area with water, add 2 to 3 tablespoons of baking soda, and bring the mixture to a gentle simmer on the stove for 10 to 15 minutes. The heat accelerates the softening, and the alkaline solution works into the burnt layer. Let the pot cool until it is safe to handle, then pour out the water and wipe or scrub gently. The burnt layer often lifts in sheets or flakes after a simmer, which is far more satisfying than grinding away at it dry. If some residue remains, repeat the simmer once before moving to a stronger method.
Method 3: Vinegar and Baking Soda for Stubborn Carbon
When baking soda alone has not finished the job, vinegar enters the picture. The classic approach is to pour enough white vinegar into the pot to cover the burnt area, bring it to a simmer for a few minutes, remove the pot from the heat, and then add baking soda. The mixture will fizz vigorously, so add the soda gradually and keep your hands clear. Once the fizzing settles, let the pot sit for 15 to 30 minutes, then scrub gently and rinse.
Here is an honest note about that famous fizz: it is mostly cosmetic. Baking soda is a base and vinegar is an acid, so when they meet they neutralize each other, producing carbon dioxide gas and water. The dramatic bubbling looks like powerful cleaning action, but the fizz itself does very little of the work. What actually loosens the burnt layer is the soak: the hot vinegar solution softening the residue, followed by the baking soda paste sitting on it and lifting what remains. The fizz is satisfying theatre, not chemistry doing the heavy lifting. Understanding that matters, because it tells you where to spend your time: on the soak, not on producing more bubbles.
Use this method with care on certain materials. Prolonged boiling of vinegar is not ideal for non-stick coatings, ceramic coatings, or aluminum, where strong acids can damage the surface or cause discolouration. For those pots, favour the baking soda paste or the dish soap method below, and keep any vinegar contact brief and at low heat. For stainless steel and unchipped enamel, the vinegar method is generally safe and often the step that finally shifts a layer that resisted everything else.
Method 4: Boiling Water and Dish Soap
Sometimes the simplest method is the one people overlook. Fill the pot with water to cover the burnt area, add a generous squirt of dish soap, and bring it to a boil, then reduce to a simmer for 10 to 15 minutes. Let the water cool until it is comfortable to work with, then use a wooden spoon or silicone spatula to push the softened residue off the bottom. Finish with a normal wash in hot, soapy water.
This method is particularly good for greasy burns, where the soap's job of cutting fat matters as much as the heat's job of softening the layer. It is also one of the safest options for non-stick pans, since it involves no abrasives and no strong acids or alkalis. The key detail is the same as with every method here: let the water do the work. If the residue does not lift after one simmer, repeat with fresh water and soap rather than reaching for a scourer. Two gentle rounds beat one aggressive round, both for the pot and for your arms.
Material Guide: What Your Pot Can Handle
Stainless steel is the easiest case. It tolerates soaking, baking soda paste, baking soda simmers, vinegar, and dish soap boils, and it can handle a nylon scrub pad or a non-scratch sponge. Even stainless steel has limits, though: steel wool can leave fine scratches that dull the finish and give future food more to grip, so save it as an absolute last resort, and never use it if you care about the pot's appearance. A dull, scratched stainless pot still cooks fine, but it will stain more easily from then on.
Non-stick coatings demand the gentlest treatment. Use only soft sponges, nylon pads, and wooden or silicone utensils. Never use steel wool, metal scourers, or abrasive powders on a non-stick surface, because once the coating is scratched, food will stick worse and the coating can flake. If a non-stick pot is badly burnt and gentle methods do not restore it, that may be a sign the coating was already near the end of its life. No cleaning method can repair a damaged coating, and continuing to cook on a badly flaking surface is not worth it.
Cast iron is a special case because its value lies in its seasoning, the layer of polymerized oil that gives it a natural non-stick surface. Do not soak cast iron for hours or overnight: prolonged soaking invites rust and strips seasoning. Instead, use a short hot water simmer of a few minutes, scrape gently with a pan scraper or a stiff brush, dry the pan immediately and thoroughly, and re-season with a very thin layer of oil heated until it bonds. A small amount of mild dish soap is fine on modern, well-seasoned cast iron, despite the old myth that any soap ruins it, but long soaks and dishwasher cycles are not. If the seasoning looks dull or patchy after cleaning, a round of re-seasoning restores it.
Enamelled cast iron and enamelled steel need protection from chipping and thermal shock. Avoid sudden temperature changes, avoid metal utensils on the enamel, and avoid harsh abrasives. Baking soda paste and gentle simmering are usually safe, and the maker's own enamel cleaner can help with staining. If the enamel is already chipped, be extra gentle around the chip, since exposed iron beneath can rust and the chip can spread. A chipped enamel pot can still be used if the cooking surface is intact, but it deserves careful handling.
What NOT to Do
A few common mistakes turn a recoverable pot into a ruined one. Never use steel wool or a metal scourer on non-stick, ceramic-coated, or enamelled surfaces. Never pour cold water into a screaming-hot pan, for the sake of both the pan and your skin. Never mix bleach with other cleaners, and never mix bleach with vinegar or any acid: bleach mixed with acids can release harmful chlorine gas, and bleach mixed with other household cleaners can produce dangerous fumes or damage surfaces. Bleach has no place in burnt-food removal anyway, since it does not dissolve carbonized food and it can damage finishes.
Also avoid oven cleaner on cookware unless the product specifically says it is safe for that use, and never put a pot with a plastic handle or a non-stick coating through a treatment meant for bare metal. Avoid the temptation to burn the residue off on high heat with an empty pot, which can warp the base, damage coatings, and fill the kitchen with acrid smoke. And skip the viral shortcuts that involve dryer sheets or harsh chemicals soaking in a food-contact surface: the residue they leave behind is not something you want in your next meal, and they rarely outperform a baking soda soak.
Preventing the Next Burn
Once the pot is clean, a few habits make the next rescue unnecessary. Keep the heat lower than you think you need for sauces, milk, and sugary foods, which scorch easily. Stir thick foods regularly, especially as they thicken, since the bottom layer heats fastest and sticks first. Use a heavy-bottomed pot for dishes that simmer for a long time, because it spreads heat more evenly and reduces hot spots. And if a recipe warns that something catches easily, believe it: a few minutes of attention at the stove is always cheaper than an hour of cleaning afterwards.
It also helps to deglaze promptly. If food is starting to stick but has not yet burned, a splash of water or stock while the pot is still on the heat will lift the fond, the browned layer, before it becomes a problem. That fond is flavour, not failure, as long as you catch it before it turns black. The line between a beautifully browned base and a burnt one is often just a minute or two, which is why burnt pots are a universal kitchen experience rather than a sign of bad cooking.
Quick Summary
To clean a burnt pot without hours of scrubbing, let it cool, clear loose food, then work from gentle to strong: a hot, soapy soak for 30 minutes to overnight, a baking soda paste or a 10 to 15 minute baking soda simmer, a vinegar simmer followed by baking soda for stubborn carbon (the fizz is mostly cosmetic and the soak does the work), or a dish soap boil for greasy burns. Match the method to the material: be gentlest on non-stick, avoid long soaks and re-season cast iron, tolerate more on stainless steel, and protect enamel from thermal shock and chips. Never use steel wool on non-stick, never pour cold water into a screaming-hot pan, and never mix bleach with other cleaners.
Frequently Asked Questions
What is the fastest way to clean a burnt pot?
For most burns, a baking soda simmer is the fastest reliable method: cover the burnt area with water, add 2 to 3 tablespoons of baking soda, simmer gently for 10 to 15 minutes, let it cool, and wipe away the softened residue. For light burns, a hot, soapy soak of 30 minutes to an hour may be faster overall, since it needs no stove time.
Does the vinegar and baking soda fizz actually clean the pot?
Mostly no. The fizz is carbon dioxide released when an acid meets a base, and it looks dramatic but does little cleaning on its own. What loosens the burnt layer is the soak: hot vinegar solution softening the residue, followed by baking soda sitting on it. Spend your time on the soak, not on producing more bubbles.
Can I use steel wool on a burnt stainless steel pot?
It is best avoided even on stainless steel, since steel wool can leave fine scratches that dull the finish and give future food more to grip. Use a baking soda paste or simmer with a soft sponge or nylon pad first. Steel wool should never be used on non-stick, ceramic-coated, or enamelled surfaces.
How do I clean a burnt cast iron pan without ruining it?
Do not soak cast iron for hours or overnight, since prolonged soaking invites rust and strips seasoning. Use a short hot water simmer of a few minutes, scrape gently, dry the pan immediately and thoroughly, and re-season with a very thin layer of oil. A small amount of mild dish soap is fine on well-seasoned cast iron.
Related Guides
- How to Remove Sticker Residue from Almost Anything: 6 Methods That Work
- How to Keep Bananas Fresh Longer: 7 Storage Tricks That Actually Slow Ripening
- How Long Do Leftovers Last in the Fridge?
External Resources
More in How-To & Fixes
How to Remove Sticker Residue from Almost Anything: 6 Methods That Work
How to Remove Sticker Residue from Almost Anything: 6 Methods That Work The sticker came off. The glue did not. Now you have a jar, a laptop, a book, or a window with a tacky patch that collects dust…
How to Remove Permanent Marker from Almost Anything: 6 Methods by Surface
How to Remove Permanent Marker from Almost Anything: 6 Methods by Surface Here is the secret the name hides: permanent marker is only permanent against water. Its ink is pigment locked in a resin…

Why Does My Smoke Detector Keep Chirping? 5 Causes and the Fixes
Why Does My Smoke Detector Keep Chirping? 5 Causes and the Fixes It never starts at noon. It starts at 3 a.m. — one chirp, every minute or so, from a detector you cannot quite locate in the dark. Why…